When I saw this bedroom makeover reveal by Mandi (my DIY/design idol) on Vintage Revivals I damn near shit myself. It is so, SO GOOD. Too good. I could not stop drooling over this room — or more specifically, that black ship-lap wall.

Source: vintagerevivals.com
Let’s wheel it back a bit. Can I let you in on a little secret? I am generally not a fan of ship-lap, which I’ve come to discover is absolute blasphemy around blogland (farmhouse chic is the letter of the LAW, people) but it just isn’t my jam.
However.
The black ship-lap going on in this bedroom is just

It had to be mine. I’d been bouncing around some ideas for our dining room, and this was the perfect project to bring some interest to the far wall, while keeping the color pallet nice and boring monochromatic, just the way I like it. I followed Mandi’s tutorial pretty closely, but there were a few things that I had to change up. One big difference was that I could not find any cedar fence boards, so I had to majorly improvise. Enter my dear friend, rough spruce plywood:
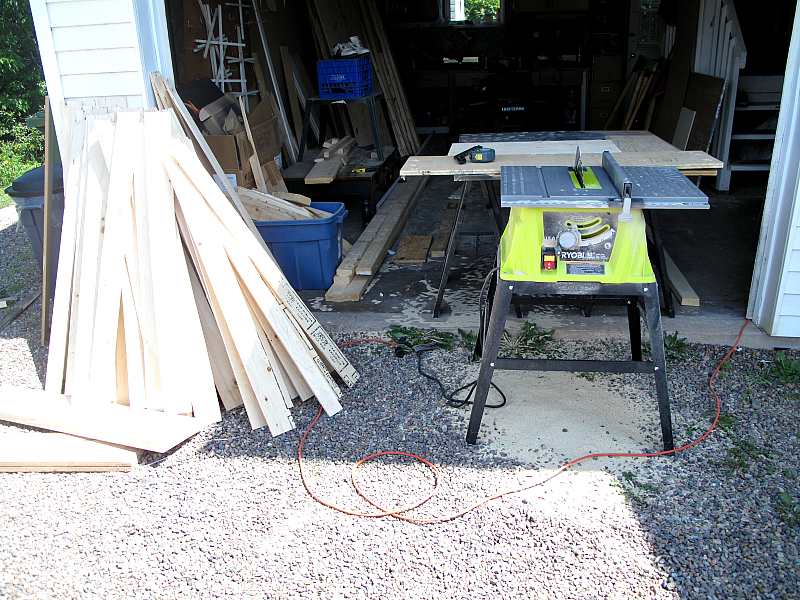
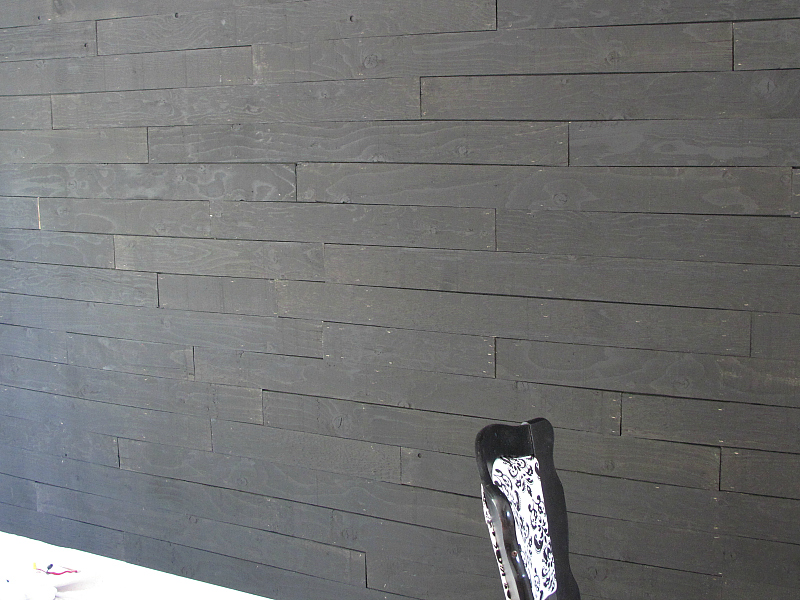
I cut three 4×8 sheets of 3/8″ plywood in half, and then ripped each half into four inch planks. I am terrible with the table saw and my boards were as crooked as my teeth circa 1997, but I rolled with it and kept my eye on the prize because that black wall was just calling my name.
After all the boards were ripped, I laid them out in the driveway, flipping the best sides up. I sanded off any stamps or markings with my hand sander and 60 grit sandpaper and then it was time to paint.
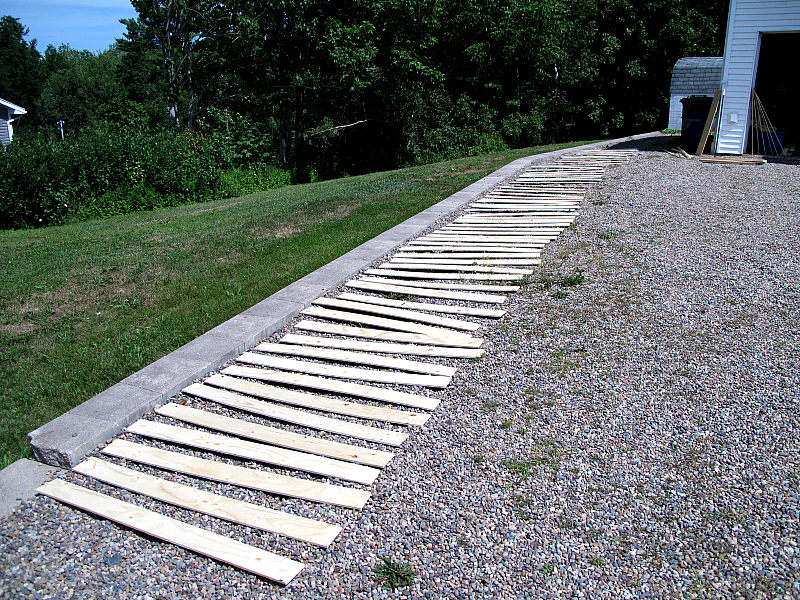
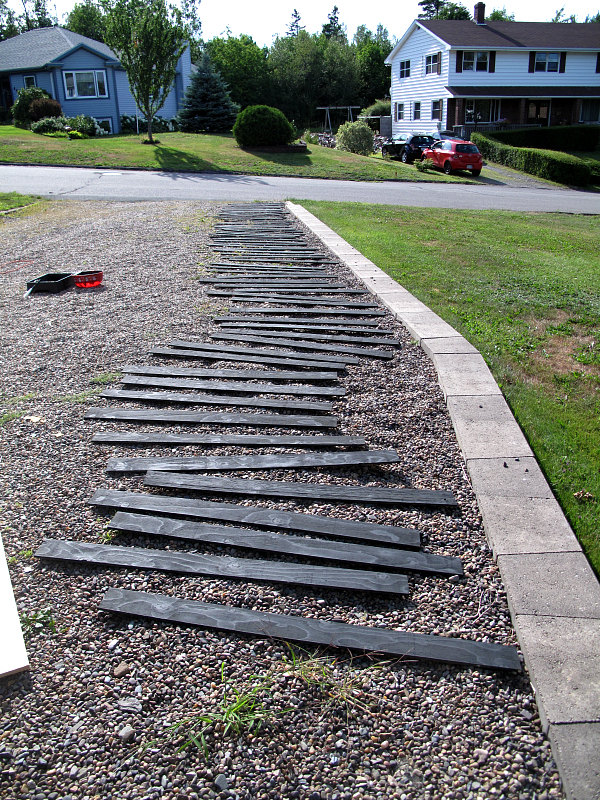
Using the mixture/ratio recommended by Mandi, I rolled on two coats of watered down black paint onto each plank. I also rolled a coat onto all the edges because I knew damn well my wonky cuts were going result in some gaps. I got the trashiest tan lines ever during this process, but on the plus side the sun dried the boards up in record time, which meant they were ready to install the next day.
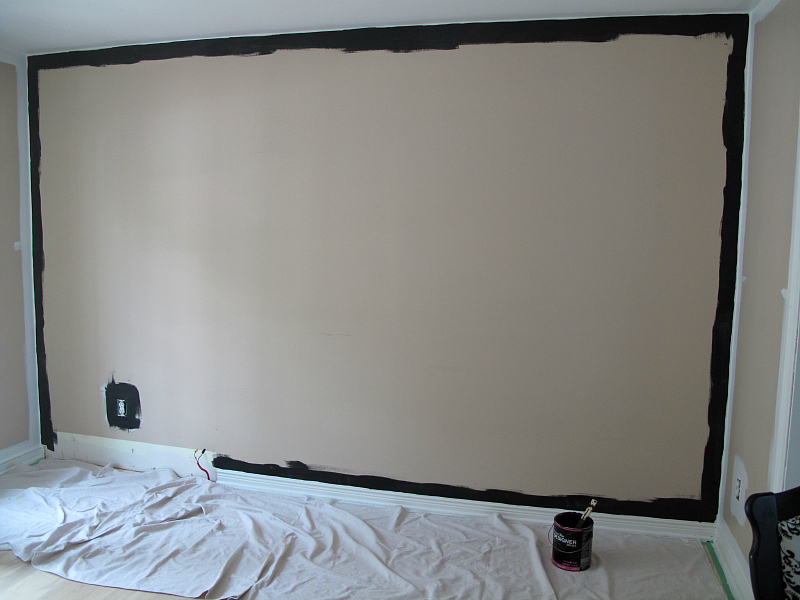
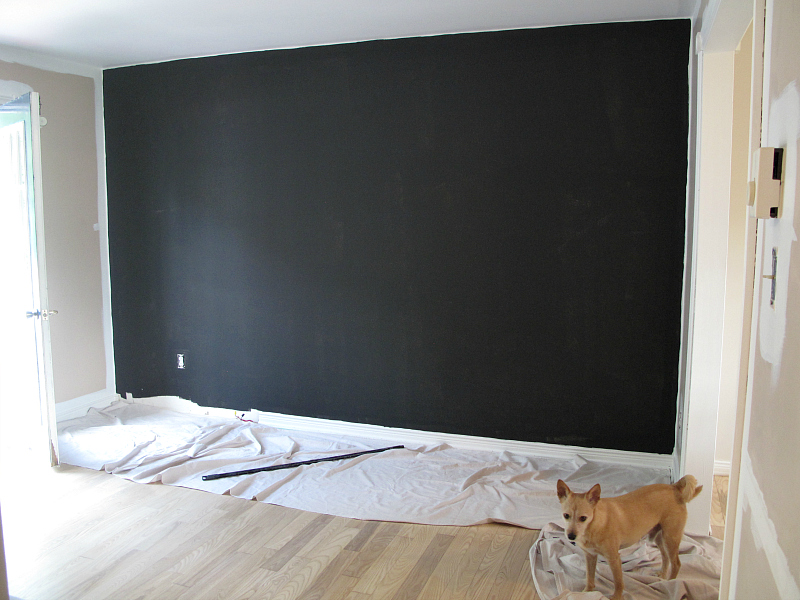
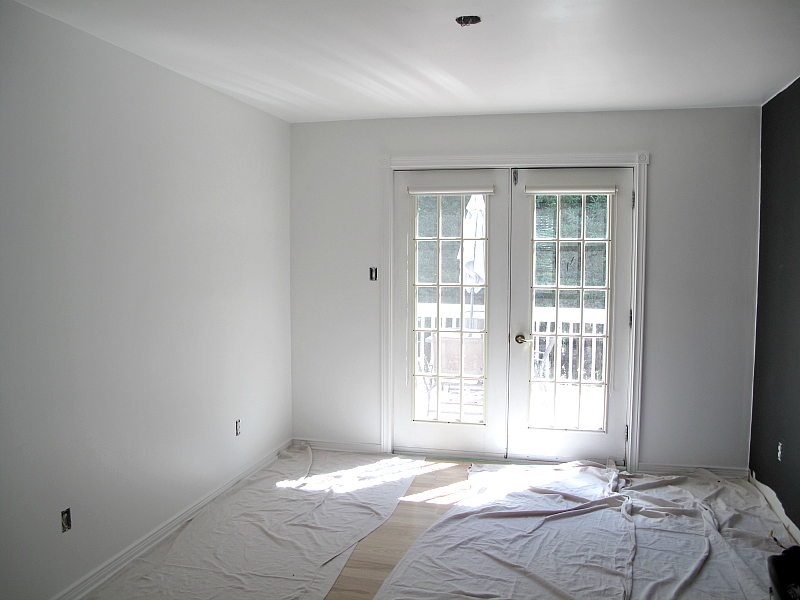
Before installation, I gave the wall I was ship-lapping (new verb — you heard it here first!) one coat of black paint, because gaps. I also painted the rest of the dining room my favorite shade of white (Polar Bear by Behr). Bye bye, beige! See you in hell…
Once I finished painting, I was ready to install the planks. I started from the bottom nailing into the studs with my nailer, trying to keep it as level as I could (this was difficult due to the terrible job I did ripping the plywood). OH WELL, TOO LATE NOW!!! I found if a plank was really not cooperating, cutting it shorter worked wonders.
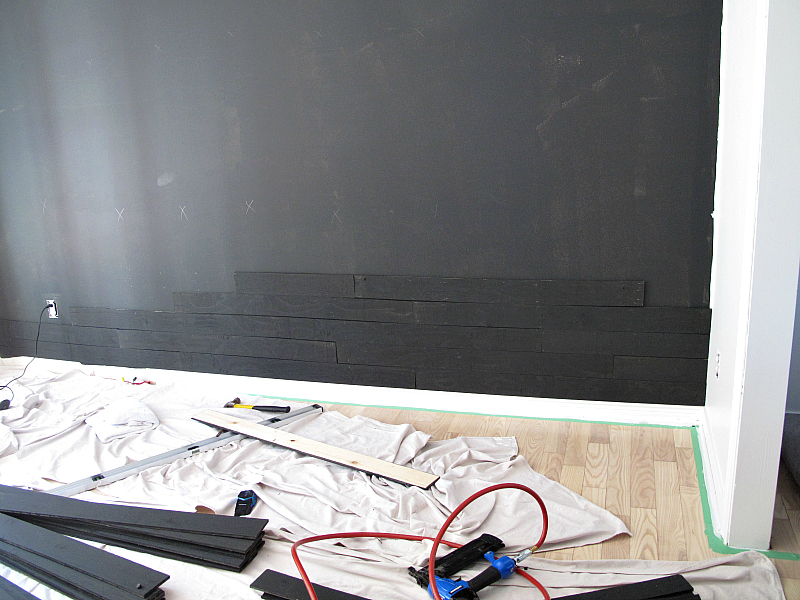
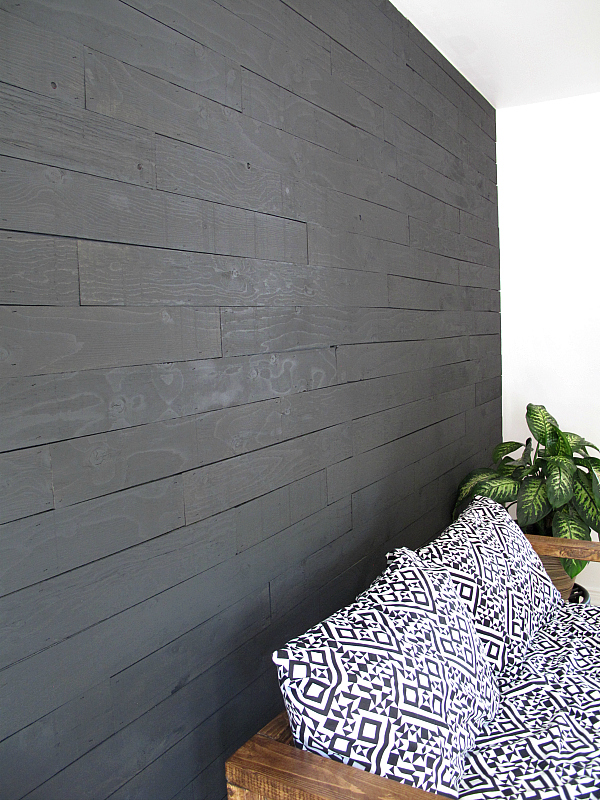
There are gaps here and there throughout the wall that can’t be helped, but I dgaf. I worked my way up the wall until I was flush with the ceiling: the last row of boards were ripped a bit thinner in order to fit.

At this point the wall looked like garbage, I won’t lie to you. All of the nail holes were showing, there were raw, unpainted cut edges exposed and it was dusty and dingy looking.
I felt a little sad, and Matt was giving me his classic “I told you painting plywood black and nailing it to the wall was a dumb idea” look (smug dillhole), but it was time to get my shit together and finish. I filled a spray bottle with some of the black paint mixture as Mandi’s tutorial instructed, and dutifully began misting the nail holes, edges, and any other area that looked like it needed some “freshening” up. I wiped the paint with a damp cloth to get rid of drips and to blend it into the planks. Holy hell, this did wonders, you don’t even know. My spirits were bolstered and by the time I was done misting, the wall looked 1,000 times better and I was pretty stoked. Once I’d moved some furniture back in, I was 100% sold on my new black wall, as was my smug dillhole of a husband (who I love dearly despite what I may say on this blog).
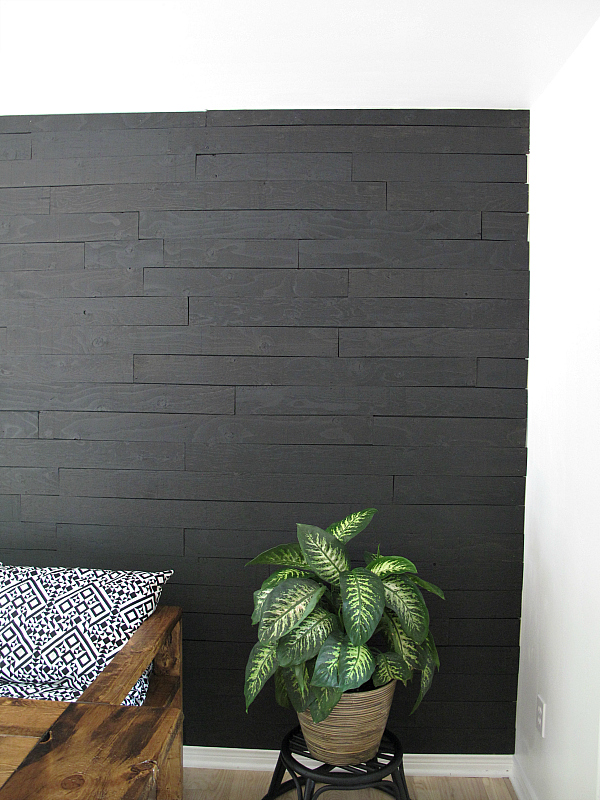
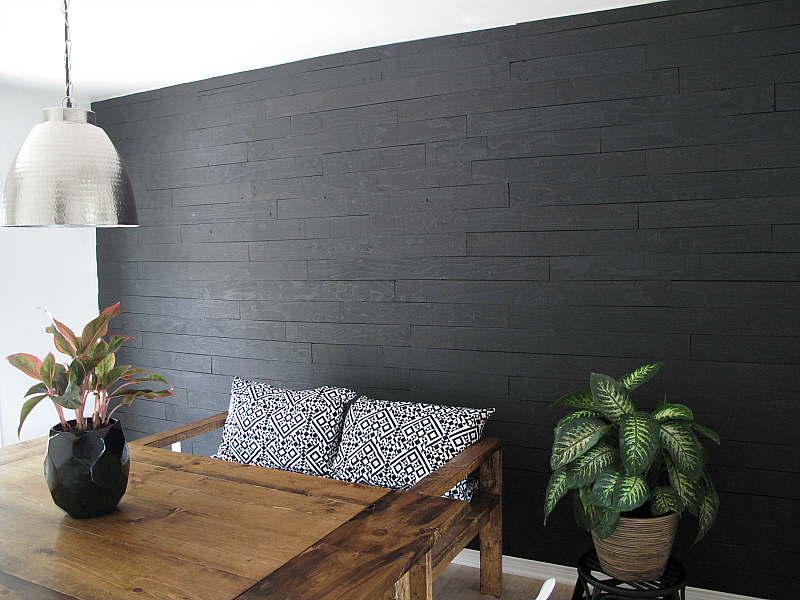
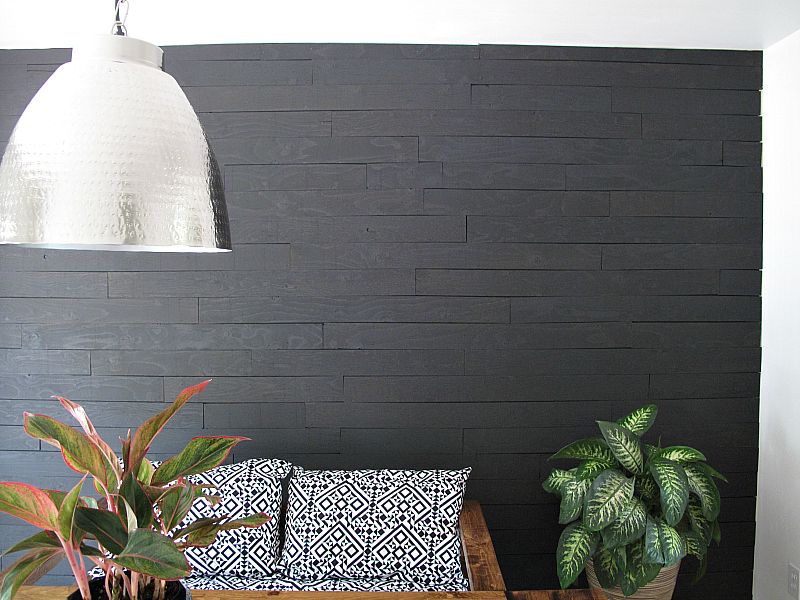
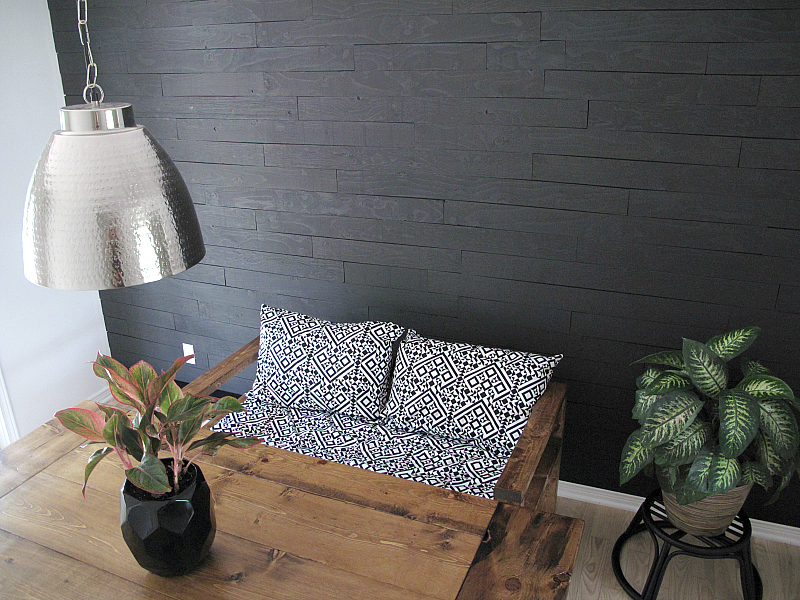
I don’t think my wall looks quite as sophisticated as Mandi’s version (the phrase “often imitated, never duplicated” really resonates here) but I do love the way it turned out, especially for the cost ($84) and effort (start to finish it only took a couple days). It’s the perfect backdrop for the dining room table I built and I can’t wait to add some artwork! I am planning on doing the same thing to the living room wall that’s next to the dining room to make it feel like one continuous space, even though there is an archway slightly dividing the two.

I would love some thoughts on artwork for the wall! Should I keep it black and white, or add some color? Let me know in the comments!


I think a white n gold piece of art would keep it clean and modernish if you are going for that theme. Nicely done!
We are soul mates Katherine! I wrote this about a month ago and since then have hung a giant black and white print in a vintage gold frame that I found at a local thrift store! Great minds! 🙂